Step 1
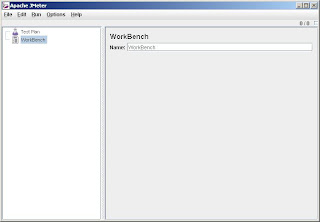
Download and install Apache JMeter on your local machine and start the jmeter.bat file which is located inside the bin folder. Once you start the bat file you it will open up Apache JMeter as shown on the Figure.

Step 2
Now let us add the things which are required to do our task.
First right click on the 'Test Plan' element and add a Thread Group.
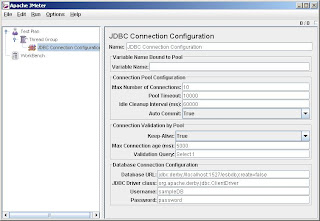
The next thing you need to add is a JDBC configuration element. To do this right click on the 'Thread Group' which you added a while ago and select 'Add -> Config Element -> JDBC Connection Configuration'.
Now you need to fill up the information to depending on the database which you have selected. Let us see what values we need to enter to test a Derby database. The following screen shot will give you a clear idea on this.

Step 3
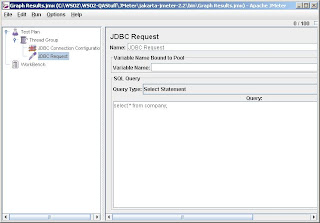
The next step is to add a 'JDBC Request' element to enter you database query. Assume that you have created a database on your Derby database and that you have a table called 'COMPANY'. Let us see how you can query this database.
Right click on the 'Thread Group' and select 'Add -> Sampler -> JDBC Request'.
Since we are going to do select some data from the database, select the the option 'Select Statement' from the combo box 'Query Type:'.

Step 4
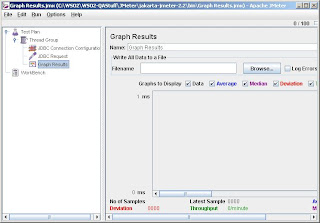
Now you need to find a way to view the performance. In order to do this you can add a listener to view the results. Therefore right click on the 'Thread Group' and select 'Add -> Listener -> Graph Results'

Step 5
Before running the test w need one more step to follow. That is to specify the number of threads. To do this click on the 'Thread Group' and specify 1000 as 'Number of Threads (users):' which is under 'Thread Properties'.
Let us try this out now. From the main menu select 'Run -> Start'. If you are executing the test for the first time it would ask you to save the test plan. Save the test plan at any location you prefer. Once the test has executed, you will see the output as shown in the following graph. You can do your test as you prefer by changing the number of threads.

No comments:
Post a Comment